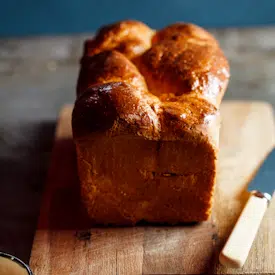
• Skip to primary navigation
  • Skip to main content
  • Skip to primary sidebar

Simply Delicious

  • Home
  • Recipes
    • Quick and Easy
    • Dinner Recipes
    • Lunch
    • Chicken Recipes
    • Meat
    • Baking Recipes
    • Dessert Recipes
    • Vegetarian
    • Gluten Free
  • Videos
  • In My Pantry
  • Contact
  • About
    • Privacy Policy

Home » Recipes » Bread Recipes » Brioche loaf

Brioche loaf

November 27, 2019 by Alida Ryder 100 Comments

Pin
Share
Jump to Recipe Print Recipe

Baking your own brioche takes a little effort but it is so worth it. Light and buttery with a pillowy interior. The leftovers are perfect for French toast.

Brioche loaf

When I first started baking bread, brioche was the one thing I found completely daunting. I feel the same way about brioche as I do about croissants. I love eating them but I don’t want to make them myself. But let me tell you, homemade brioche is a thing of absolute beauty. Bubble-topped and begging to be sliced into. As you slice into the still-warm loaf, you’ll be met with a burst of steam with the aroma of butter and yeast. Drool-worthy stuff, I tell you. It’s also obvious at that moment that all the hard work is completely worth it. I’ve made this loaf over and over again and I can tell you, it’s delicious every single time.

All my tips and tricks to make the perfect brioche can be found below the recipe.

Brioche loaf

Baking your own brioche takes a little effort but it is so worth it. Light and buttery with a pillowy interior. The leftovers are perfect for French toast. Allow time for the dough to rest overnight. {Allow +- 12 hours for dough to prove overnight.}
4.57 from 48 votes
Print Pin Rate
Course: Bread, Brioche
Prep Time: 35 minutes
Cook Time: 45 minutes
Total Time: 1 hour 20 minutes
Servings: 2 loaves
Author: Alida Ryder

Ingredients

  • 125 ml warm milk
  • 3 tablespoons/70g sugar
  • 10 g dried yeast
  • 4 eggs
  • 500 g flour
  • 2 teaspoons salt
  • 175 g butter cubed (remove the butter from the fridge 30 minutes before you want to start. Butter needs to be slightly soft.)
  • 1 egg beaten (for egg wash)

Instructions

  • Combine the milk, sugar and yeast in the bowl of a free-standing mixer and allow to stand for 5 minutes until the mixture is creamy and start to froth slightly.
  • Add the eggs and beat well until the eggs are well incorporated and the mixture is light and creamy.
  • Slowly add the flour and salt with the mixer running until the flour has been incorporated.
  • Allow to knead at medium speed for a minute.
  • Slowly add the cubes of butter and knead for another 5 minutes.
  • The dough will begin to pull away from the sides of the bowl and will cling to the paddle.
  • Remove the dough and place in a buttered bowl.
  • Cover with clingwrap and allow to rise for 2 hours.
  • Place in the fridge and allow to stand overnight.
  • The next day, remove the dough from the fridge and allow to come to room temperature.
  • Divide the dough in half and place in greased loaf tins.
  • Allow to rise for another 2 hours.
  • Pre-heat the oven to 180°c. Brush the loaves with the egg wash.
  • Bake the loaves for 40-45 minutes until the loaves are golden brown and sound hollow when tapped.
  • Remove from the oven and allow to cool.

Tips for making the best brioche bread

  1. Making brioche can seem overwhelming but my number one tip is to use a stand mixer fitted with a dough hook. Letting the machine do the kneading for you makes this a breeze and gives you control to manipulate the dough. However, this recipe is 100% doable by hand.
  2. Combine warm milk(blood temperature – if you stick your finger into the milk it should feel almost like nothing. That means it is body temperature), sugar and yeast in the bowl of a stand mixer. Allow to stand for 5 minutes until frothy. This step activates the yeast and gets it going.
  3. Once the eggs, flour and salt is added, knead the dough for a minute or two until everything is well incorporated.
  4. Slowly start adding the butter, bit by bit, until it too is incorporated into the dough. At this point the dough might seem very sticky but continue kneading until the dough starts to come away from the sides of the bowl. If it doesn’t and it is still very wet, simply add 2-3 tablespoons of flour, one at a time, until the dough firms up a little. The flour will also continue hydrating as it rises.
  5. Cover the dough with plastic wrap then allow to rise for 2 hours at room temperature. After that, place it in the fridge overnight. This step is crucial as this slow fermentation builds loads of flavor.
  6. Once ready to bake, remove the dough from the fridge and transfer to a clean, greased bowl and cover with a damp tea towel. Allow to come up to room temperature.
  7. Break pieces of dough (approximately the size of tennis balls) off and form into rough balls. Place into 2 lined loaf pans then cover again with the damp tea towel and allow to rise while you allow the oven to preheat.
  8. Brush the loaves with beaten egg and place in the oven. Allow to bake until puffed and golden. Remove from the oven and if you can resist temptation, allow to cool before slicing.

Brioche loaf

Bread recipes

  1. Rosemary Pecorino Potato bread
  2. Cheese and herb Irish soda bread
  3. Easy garlic butter dinner rolls
  4. Homemade ham and cheese crescent rolls


Pin
Share

Filed Under: Baking Recipes, Bread Recipes, Recipes Tagged With: Bread, brioche, brioche loaf, brioche recipe

Subscribe

Previous Post: « French onion soup puffs
Next Post: Sticky apricot baked ham »

Reader Interactions

Comments

  1. Linda

    October 25, 2020 at 3:09 PM

    Hi, could you tell me what flour you used

    Reply
    • Alida Ryder

      November 2, 2020 at 3:36 PM

      Bread flour.

      Reply
  2. Annette

    July 15, 2020 at 7:40 PM

    Hello Alida. Thank you for this recipe it is delicious! I’ve made it twice now and have a couple of questions. The first time I left the batter to rise on the counter and it overflowed so I had to change it to a larger bowl before I put it in the fridge, next day I followed instructions but they only got to the rim of the loaf pan and I figured the the over handling of the batter had been the culprit. The second time everything went well and I put it in the fridge but the batter sunk in the middle, I followed the rest of the instructions and again the didn’t rise over the rim of the pan. What do you think I did wrong? Thank you Annette

    Reply
    • Alida Ryder

      July 19, 2020 at 11:25 AM

      It might be that your pans are a little larger than mine. If the finished loaves are light, buttery and golden brown the height shouldn’t be too much of a concern. But yes, overhandling the dough can deflate it quite a lot.

      Reply
  3. Noelle

    May 25, 2020 at 1:03 AM

    ALIDA, My loaf is lovely and brown but not fully cooked in the middle. I am not sure where I went wrong

    Reply
    • Alida Ryder

      May 25, 2020 at 1:39 PM

      It could be that your oven is a little too hot so the outside browns very quickly before the inside has time to fully cook. Next time turn your oven down a little and if the loaf browns too quickly loosely cover with a piece of foil for the remainder of the baking time.

      Reply
  4. Safa Ghanem

    April 29, 2020 at 11:18 PM

    Hi, was wondering if I could use fresh yeast here? If so how much?
    Thanks

    Reply
    • Alida Ryder

      May 1, 2020 at 9:47 AM

      I haven’t tested this myself but having read up about it, it seems that you need around 3x the amount fresh yeast as instant dry yeast.

      Reply
  5. Jessica

    April 10, 2020 at 9:27 PM

    Hello,

    My dough is resting in the fridge but I am wondering, was it supposed to double in bulk during the first two hours on the counter before going in the fridge? My dough didn’t really rise as much as a usual yeasted bread but I’ve never made brioche so I’m worried!

    Reply
    • Alida Ryder

      April 11, 2020 at 1:40 PM

      It doesn’t matter to be honest, as long as it has a slow rise in the fridge.

      Reply
  6. Vivienne

    April 9, 2020 at 1:10 PM

    Delicious- my yeast was a bit out of date so didn’t rise as well as it should but still light- just finer texture. Easy to make with my Kenwood. Thanks for the recipe!

    Reply
  7. Ivona Heck

    April 8, 2020 at 9:33 AM

    Thank you for sharing! May we put them in muffin tins and bake as individuals?

    Reply
    • Alida Ryder

      April 11, 2020 at 1:47 PM

      Absolutely.

      Reply
  8. Sammy

    April 1, 2020 at 7:11 PM

    Hi, do we have to punch down the dough before we place it in the fridge?

    Reply
    • Alida Ryder

      April 3, 2020 at 5:25 PM

      Nope, no need.

      Reply
  9. Gizelle

    January 11, 2020 at 11:13 PM

    if i start making it in the morning then leaving it during the day and finishing it off at night instead of letting it rest over night, that would still work right? how many hours roughly should it be in the fridge for?

    Excited to give this a try as my French friend said with Brioche is the traditional way to have french toast! Also i just love Brioche

    Reply
    • Alida Ryder

      January 12, 2020 at 3:56 PM

      That should be fine. The longer it is in the fridge the better!

      Reply
  10. YY Lee

    July 10, 2018 at 8:49 AM

    I am a beginner in baking and I have just tried out this recipe. The bread turns out perfect and taste great. The steps are easy to follow too. Fully recommend anyone who likes Brioche!

    Reply
  11. Robert Wigington

    January 3, 2018 at 6:24 PM

    Alida, what kind of milk do you suggest? I have read whole milk elsewhere.
    Does the fat content make a difference?

    Reply
    • Alida Ryder

      January 4, 2018 at 8:48 AM

      Yes, wholemilk or full cream milk is best in a brioche dough. 🙂

      Reply
  12. Zanna maison

    September 8, 2017 at 11:16 PM

    Hi there, the recipe does not state what size bread tins to use.

    Reply
    • Alida Ryder

      September 24, 2017 at 7:50 PM

      I’m not sure what the exact measurements are but a 9 inch x 4/5 inch should be perfect.

      Reply
  13. Athena

    July 7, 2017 at 4:18 AM

    Hi! I’m considering making this recipe into loaf since I have 30cmx12cm tin. Would that work? What is the approximate baking time if so? Thanks!

    Reply
    • Alida Ryder

      July 10, 2017 at 12:49 PM

      It should, I would bake it for at least 45 minutes and then check it every 10 minutes from there.

      Reply
  14. JP

    April 13, 2017 at 3:47 PM

    Hi. If you doing this by hand, how long does one need to knead the dough?

    Reply
    • Alida Ryder

      April 13, 2017 at 6:21 PM

      Probably around 5-10 minutes until you have a very smooth dough.

      Reply
  15. Claire

    December 24, 2016 at 2:16 AM

    The leftovers are super perfect for French toast!!!! Thanks for recommending <3

    Reply
  16. Drew Faber

    December 2, 2016 at 7:39 PM

    Please correct the total time needed for this recipe. By my calculations, just using the time references called out in the recipe (skipping the actual time to do work,) I calculate the total time minimum to be nearly 14 hours, not “1 hour 20 mins.”

    Reply
    • Alida Ryder

      December 3, 2016 at 7:37 AM

      Hi Drew. I only include the time you’ll be actively busy with a recipe. I encourage readers to read the full recipe before starting so to see what equipment they need and how much time they need to allow for things like dough rising, etc. I will however add a note at the top of the recipe to allow time for the dough to prove.

      Reply
  17. Raufikat

    October 6, 2016 at 11:10 AM

    Hi,
    I’ve had terrible luck making bread but this seemed easy enough so I tried it. First off, i ended up with a batter, not a dough. I added a bit more flour but I didn’t want it to be dry so it was extremely wet and sticky. I proved it and it seemed to have tightened up, but when I went to knead and shape it, it was still a wet mess. I proved and baked it as directed. It had a delicious taste but was VERY crumbly. What could have gone wrong? Want to try again because it tasted really good. Thanks!

    Reply
    • Alida Ryder

      October 6, 2016 at 3:43 PM

      The dough is meant to be very soft and sticky. It’s definitely not like any other bread dough, however it should also not be as completely wet as a pancake batter for instance. A wet/sticky dough gives you a very soft loaf which is why brioche is so light and buttery inside. The fact that yours was crumbly is very confusing to me. I actually have no idea what could’ve gone wrong there, to be completely honest. I’ll try to Google a bit to see what could’ve happened there and will get back to you.

      Reply
      • Raufikat

        October 6, 2016 at 5:05 PM

        I appreciate it! Thanks in advance!

        Reply
  18. Nas

    May 13, 2016 at 11:33 PM

    Can I use this recipe for chocolate roll brioche. Does it freeze well?

    Reply
    • Alida Ryder

      May 14, 2016 at 8:20 AM

      I’m sure you could. To be honest, I’ve never frozen this recipe and am not sure how it will freeze due to the amount of butter? However, after a quick Google it seems you can freeze brioche dough. I would remove it from the freezer the night before you plan on baking it to give it efficient time to defrost.

      Reply
  19. Nas

    May 13, 2016 at 12:29 PM

    Can I make chocolate filled Brioche using the same recipe and can I make a day ahead to be served for the party?

    Reply
    • Alida Ryder

      May 14, 2016 at 8:25 AM

      I’m sure you could! I would make the dough a day ahead but then bake it on the day you intend on serving it.

      Reply
    • Elaine

      November 27, 2019 at 8:40 PM

      Hmm I am confused. You state to leave the dough in the oven overnight and then in the next step you say to remove it from the fridge and let come to room temp. So can you just overnight it in the oven with the light on or do you want the slower cold rise by putting it in the fridge overnight? Also do you smooth the sought balls together or do they manage to do that on their own during the last rise and then in the oven? Thanks!!

      Reply
      • Alida Ryder

        November 30, 2019 at 8:44 AM

        Completely my mistake, I’ve amended it. THe dough rests in the fridge overnight for slow fermentation. The dough balls bake into one loaf so no need to press them together.

        Reply
        • Elaine

          November 30, 2019 at 4:43 PM

          Thank you so much for the clarification!

          Reply
  20. Marcy

    April 19, 2016 at 6:14 PM

    This looks great! Two quick questions – do you is a dough hook or just the regular paddle with your mixer and how long do you leave it out to get to room temperature – 1 hour? Thanks!!

    Reply
    • Alida Ryder

      April 26, 2016 at 4:24 PM

      I used the dough hook and yep, around 1 hour should do the trick.

      Reply
  21. brinacyl

    March 30, 2016 at 3:04 AM

    hi alida can I use butter flavoured crisco ( vegetable shortening) and soy milk / almond / coconut milk ? my baby can’t have dairy. also what does ” sound hollow when tapped ” means ? i know this is a stupid question, how do i tap it ? once i baked a brioche loaf, checked with a skewer inserted, which came out clean, but the loaf collapsed as the centre was not cooked (right in the middle). many thanks

    Reply
    • Alida Ryder

      March 31, 2016 at 4:32 PM

      You could but I’m not sure it will alter the texture of the loaf, you’ll have to experiment with it. The thing with bread is that because the dough is quite stiff, there’s nothing for the skewer to cling to so it could be raw even though the skewer comes out clean. If you upend the baked loaf and tap on the bottom, there will be a hollow sound if the bread is cooked through.

      Reply
  22. Liz T

    March 24, 2016 at 3:06 AM

    Hello! Just stumbled on this recipe. Stupid question, but since you were using a stand mixer, did you use the standard paddle attachment or the dough hook?

    Thanks!

    Reply
    • Alida Ryder

      March 27, 2016 at 11:15 AM

      I used the dough hook, and not a stupid question at all!

      Reply
  23. Hailey

    February 29, 2016 at 8:57 PM

    Do you, by any chance, have this in US measurements? I would love to give this a try!!

    Reply
    • Alida Ryder

      March 17, 2016 at 3:09 PM

      I don’t but you can try this conversion chart: http://simply-delicious-food.com/2014/03/26/conversion-chart/

      Reply
      • Edward Francis Hudaverdi

        January 5, 2017 at 4:40 AM

        I’m glad Hailey asked the question, and I hope the chart will give the answers. I realise only Americans use our weights and measures, but it would be helpful to give American alternatives we would readily understand.

        Reply
  24. jean

    January 21, 2016 at 2:56 AM

    2 teaspoon of salt… Is that correct?!?

    Reply
    • Alida Ryder

      January 27, 2016 at 8:42 AM

      Yep, because the dough is enriched with sugar, eggs and butter, the salt is needed to balance it all out. And remember, this makes two loaves or one very large loaf so that amount isn’t actually that much.

      Reply
  25. Yvonne

    January 19, 2016 at 10:17 PM

    I’ve tried converting measurements to imperial. Though not exact, these are the closest I’ve come:

    125ml milk = 1/2 cup (120ml)
    10g yeast = 2 1/4 tsp (one envelope)
    500g flour = 3 1/3 cups
    175g butter = 6 oz (130g)

    I haven’t tried the recipe yet, but I will do so this week.

    Reply
    • Yvonne

      January 19, 2016 at 10:23 PM

      Correction: 6 oz butter is 180g

      Reply
  26. Chris

    August 22, 2015 at 4:09 PM

    Just wondering, what are the dimensions of the loaf tins you used?

    Reply
    • Alida Ryder

      August 25, 2015 at 9:52 AM

      They were around 20cmx12cm.

      Reply
  27. chloe

    August 14, 2015 at 7:50 PM

    Does the dough have to stand over night in the fridge or can it be used after the rise .

    Reply
    • Alida Ryder

      August 17, 2015 at 8:14 AM

      The proving overnight improves the flavour of the dough tremendously but if you’re in a hurry, you can definitely use it right away. The flavour just won’t be as good as a proper brioche.

      Reply
  28. veeya

    March 23, 2015 at 6:17 AM

    Hi Alida!

    So you used the paddle attachment on your mixer and not the dough hook right? Dying to try this recipe! Your loaf looks amazing 🙂

    Reply
    • Alida Ryder

      March 23, 2015 at 3:05 PM

      No, I used the dough hook. Does a much better job of kneading than the paddle would.

      Reply
  29. Annemay

    February 3, 2015 at 11:12 AM

    Hi Alida, I’m dying to try this recipe and I’m planning on prepping the dough today. The thing is, I won’t have time to bake it tomorrow… Do you think another day + night of resting would affect the dough? Perhaps punch the dough down once or twice if it rises too much? Thanks!

    Reply
    • Alida Ryder

      February 10, 2015 at 4:06 PM

      Hi Annemay. So sorry for only responding to your comment now. No, I don’t think that the extra resting time will do anything to the dough. IN fact, the flavour will probably just be better!

      Reply
  30. Elaine

    February 1, 2015 at 7:33 AM

    I’m not sure if step 6 is a good description. Watched some videos and made brioche a couple of times and the brioche batter does not come off from the sides like a traditional dough. It would resemble a thicker cake batter?

    Reply
    • Alida Ryder

      February 3, 2015 at 8:16 AM

      Hi Elaine, thanks for your comment. I have made this brioche a few times and when the dough has been kneaded enough, it does pull away slightly from the bowl. It could just be my dough? When I make it again I’ll make sure to check out for that and will amend the recipe if I find that it doesn’t pull away.

      Reply
  31. Yana

    January 30, 2015 at 6:59 PM

    i read in the comments that you used bread flour but do you think all purpose flour will work as well?

    Reply
    • Alida Ryder

      February 3, 2015 at 8:19 AM

      Yana, all purpose flour doesn’t have as high gluten content as bread/strong flour. You need the gluten to create the texture you’re after when you’re baking bread, but especially brioche. But of course you could give it a go, it might just be slightly softer? Let me know if you do try it how the brioche turns out.

      Reply
      • Elaine

        November 27, 2019 at 8:45 PM

        In Canada you can use AP flour as our flour is different from American flour. Anyone serious about baking should learn to weigh their ingredients for accuracy. You can get an inexpensive digital scale at any kitchen supply store. I suspect the person who had a batter instead of a dough did not measure accurately or had dead yeast.

        Reply
  32. The Blonde Chef

    October 27, 2014 at 12:24 AM

    This looks incredible! I wish I had a slice right now!

    Reply
    • Alida Ryder

      October 28, 2014 at 11:12 AM

      It is the most delectable treat. You must make it! 😉 x

      Reply
  33. Alida Ryder

    October 13, 2014 at 9:28 AM

    If you’re using a Tablespoon with 15ml capacity it will be between 60g and 70g. I just re-weighed it and it came in at 66g when I used 3 tablespoons.

    Reply
  34. Alex

    October 11, 2014 at 3:02 AM

    My bad it’d be 36g…

    Reply
  35. Alex

    October 11, 2014 at 3:00 AM

    Um, is that 70g of sugar, or 3 tablespoons? Because 3 tablespoons would be 48grams…

    Reply
  36. Alida Ryder

    September 14, 2014 at 10:52 AM

    Michelle I used bread flour or strong flour as I know it’s called in some places.

    Reply
  37. Michelle

    September 13, 2014 at 3:53 AM

    Hi what flour did you use?

    Reply
  38. Charlene

    September 6, 2014 at 12:20 AM

    Do you plait a brioche to get the shape on top.

    Reply
    • Alida Ryder

      September 6, 2014 at 8:01 AM

      Charlene, by placing little balls of the dough in the loaf tin it rises while it proofs and will then create that shape.

      Reply
  39. Sara

    July 10, 2014 at 8:20 PM

    Hi what type if yeast did you use? Is dried active yeast ok to use for this recipe? Thanks

    Reply
    • Alida Ryder

      July 10, 2014 at 8:31 PM

      Sara, I used dried yeast and it worked perfectly.

      Reply
  40. Alida Ryder

    June 4, 2014 at 11:21 AM

    Sheri, I don’t but you can use my conversion chart which will be way to convert this recipe.

    Reply
  41. Alida Ryder

    June 4, 2014 at 11:19 AM

    You can use my Conversion chart to convert this recipe.

    Reply
  42. Sheri

    June 3, 2014 at 10:19 PM

    Would you have this recipe converted to American by chance?

    Reply
  43. Ed

    May 31, 2014 at 12:41 AM

    Do you have ingredients in imperial versus metric?

    Reply
    • Michael Romeo Belisario

      September 4, 2018 at 7:47 AM

      Could you let this dough rest in the fridge for 48 hours instead of 24?

      Reply
      • Alida Ryder

        September 10, 2018 at 8:27 AM

        I’m sure that will be fine. It will definitely add to the flavor.

        Reply
  44. Alida Ryder

    May 30, 2014 at 8:07 AM

    Yep, 9×5 should be perfect!

    Reply
  45. lina

    May 29, 2014 at 10:42 PM

    do you use 9×5 loaf pans? thanks!

    Reply
  46. Alida Ryder

    May 28, 2014 at 8:18 AM

    Absolutely not Jess. Plus you’ll get a good arm workout! 😉

    Reply
  47. Jess Anderson

    May 24, 2014 at 3:04 AM

    This looks awesome! Except I don’t have a paddle mixer. Do you think there would be a drastic difference if I was making this by hand?

    Reply
  48. Flynn

    April 28, 2014 at 11:40 PM

    The top looks braided. Is that how you got the knobbiness on top?

    Reply
    • Alida Ryder

      April 29, 2014 at 10:32 AM

      Flynn, I broke the dough into tennis ball-sized balls and placed them next to each other in the tin. This created the bubble top that you see. 🙂

      Reply
      • Flynn

        April 29, 2014 at 8:04 PM

        Oh cool. Thanks! I’m letting my dough warm up right now.

        Reply
  49. Herma

    April 13, 2014 at 12:25 PM

    I made this recipe yesterday and it came out great Thanks for sharing

    Reply
    • Alida Ryder

      April 14, 2014 at 9:34 AM

      So glad you liked it!

      Reply
  50. Karen @ The Food Charlatan

    March 20, 2014 at 1:35 AM

    This looks aaaaaaaamazing. I don’t think any other picture today has made me crave carbs more 🙂 PS love the idea of using this dough for a burger bun. Yum.

    Reply
    • Alida Ryder

      March 20, 2014 at 9:25 AM

      Thanks for the lovely comment Karen!

      Reply
  51. Alida Ryder

    March 18, 2014 at 6:27 PM

    If you do, let me know what you think. And you’re right, the inside is so soft and fluffy, it’s like a dreamy, buttery cloud!

    Reply
  52. Sweet and Savoury Pursuits

    March 18, 2014 at 3:13 PM

    Your loaf looks beautiful! I love how the inside seems so fluffy, makes me want to give this recipe a try. Thanks!

    Reply

Leave a Reply Cancel reply

Your email address will not be published. Required fields are marked *

Recipe Rating


This site uses Akismet to reduce spam. Learn how your comment data is processed.

Primary Sidebar

Hi! I'm Alida, mom of twins and creator of Simply Delicious. I hope to encourage a love for cooking by creating fool-proof recipes that are easy and delicious. Read More…

Chicken Recipes

Creamy corn pasta with parmesan crusted chicken

Creamy corn pasta with parmesan crusted chicken

Hawaiian chicken skewers

Chicken Parmesan meatballs in tomato sauce with mozzarella

Chicken Parmesan Meatballs

Miso chicken noodle salad

Miso chicken noodle salad

Harissa grilled chicken wings

Curried Grilled Chicken Breast

Easy Curried Grilled Chicken Breast

Seafood Recipes

Grilled garlic butter prawns

Grilled garlic butter prawns

Sticky honey sriracha salmon with coconut rice

Sticky honey sriracha salmon with coconut rice

Seared scallops with lemon caper sauce

Seared scallops with lemon caper sauce

Pasta vongole

Pasta Vongole

Conversion Chart

Simply Delicious conversion chart

DMCA Protection

Website Content Protection

Copyright © 2022 Simply Delicious on the Foodie Pro Theme Privacy