Easy Focaccia Bread Recipe
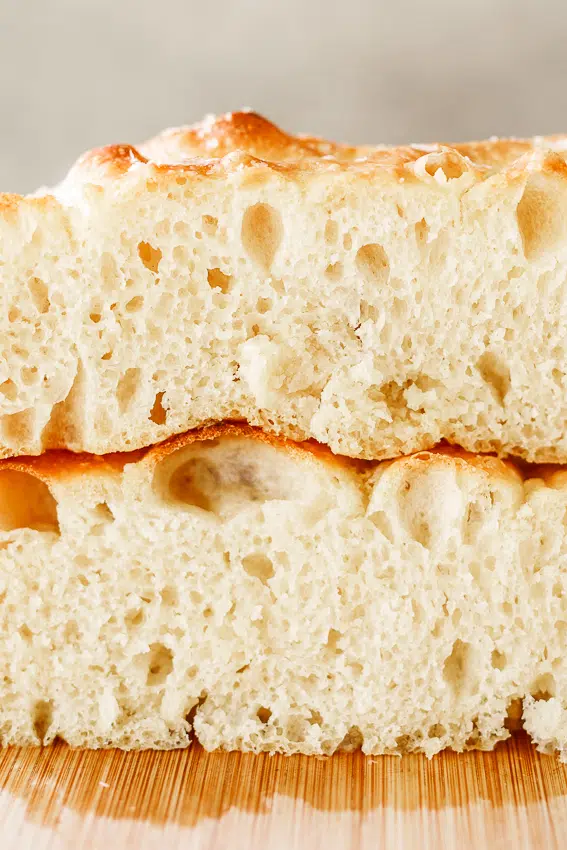
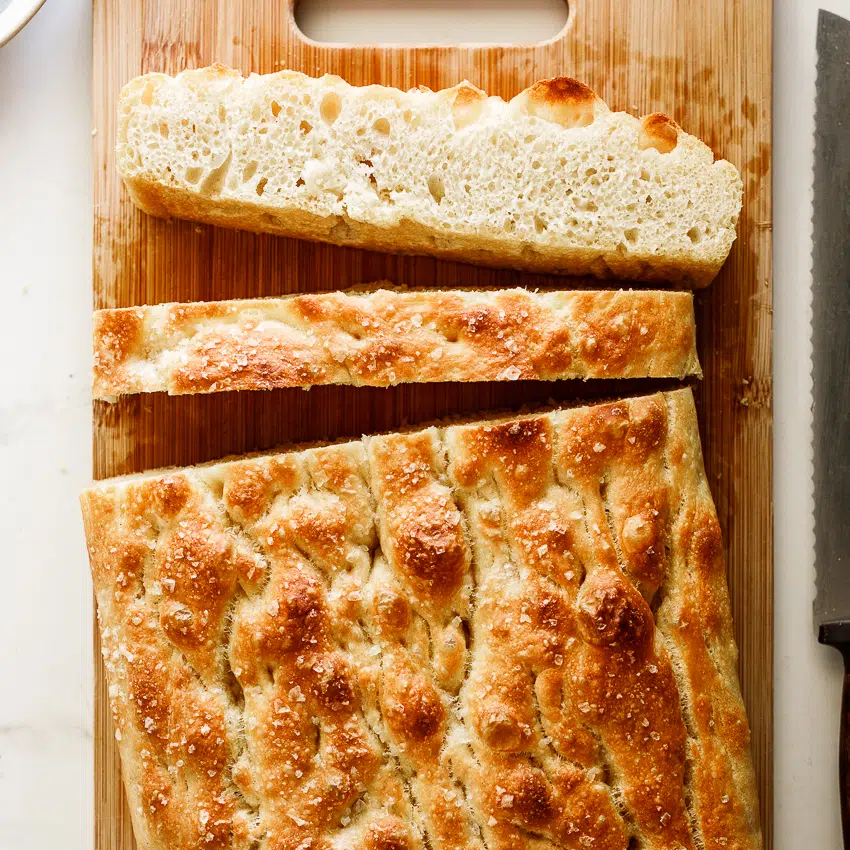
This focaccia bread recipe is easy to make and so satisfying to eat. Soft on the inside with a satisfying crispy crust flavored simply with olive oil and salt.

This focaccia is a same-day recipe – no overnight rise needed. From mixing to eating in about 2–3 hours.
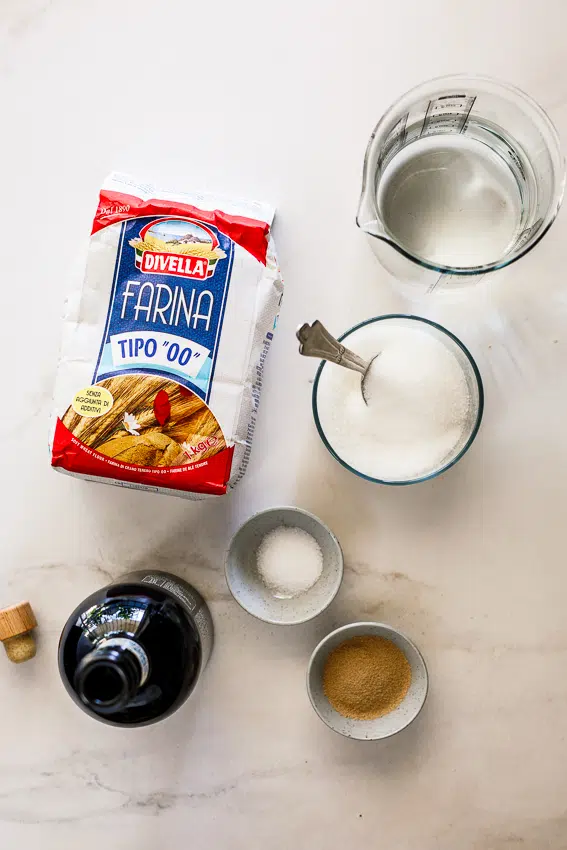
Ingredients and Substitutions
- Flour. I’ve made this using 00-flour, regular bread flour and a combination of all-purpose and bread flour. The 00-flour and bread flour produce a chewier loaf but the all purpose flour is still delicious and great if that’s the only flour you have.
- Instant yeast. For ease, I always use instant yeast for my bread recipes. If using active dry yeast, don’t skip the proofing of the yeast as the larger granules in active dry yeast requires warm water to activate.
- Salt.
- Sugar.
- Extra-virgin Olive oil.
- Warm water.
What Flour Should You Use for Focaccia?
I use 00 flour for this focaccia recipe and it’s honestly a game-changer. 00 flour is finely milled Italian flour that creates an incredibly light, airy crumb with a beautifully crisp crust – exactly what you want in authentic focaccia. It absorbs water differently than other flours, which is why this dough is quite wet and sticky. That said, if you don’t have 00 flour, don’t worry. This recipe works with other flours too. All-purpose flour (or plain flour if you’re in the UK) is the most accessible option and produces a delicious, slightly denser focaccia. Bread flour, with its higher protein content, creates a chewier texture and more structured crumb. The recipe and method stay exactly the same regardless of which flour you use, though you may need to adjust the water slightly with bread flour as it absorbs more liquid. For the best results and that authentic Italian texture, I highly recommend 00 flour, but use what you have. You’ll still end up with incredible homemade focaccia.
How To Make Focaccia Bread
This recipe shows you how to make focaccia bread from scratch with just a few pantry staples. No kneading required, and it’s ready the same day.
Proof the yeast. This step is technically not necessary but I prefer making sure my yeast is active. Combine the instant yeast with warm water and sugar. The water should be just warm enough so that when you put your finger in, it feels like nothing – this is called blood temperature. Allow this mixture to stand for a few minutes until foamy.
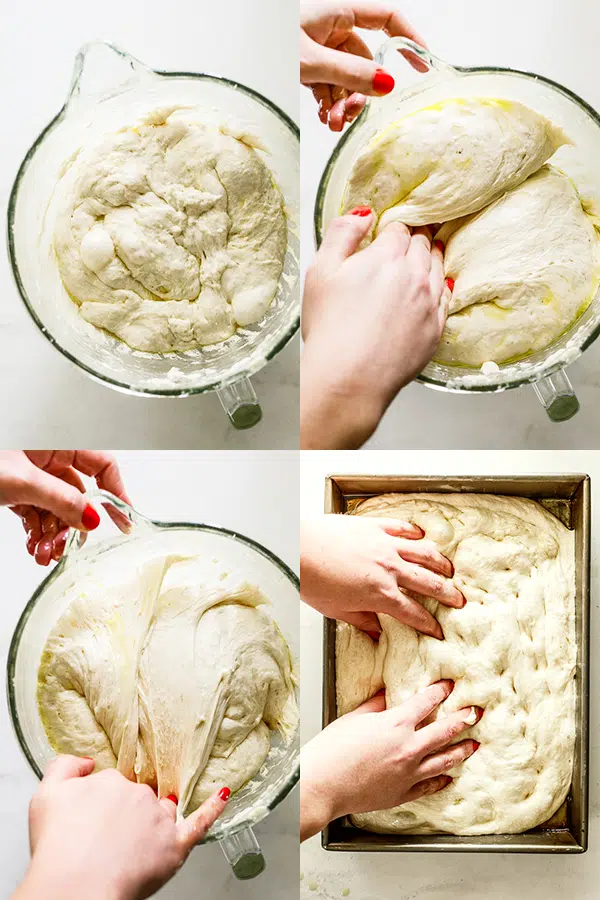
Make the dough. Combine the flour and salt in a large bowl (I use my stand mixer fitted with the dough hook attachment). Stir together then pour in the yeast mixture and 1 tablespoon of olive oil. Mix for a few minutes until everything is well combined. The dough will be very wet and sticky, almost like a thick batter. Drizzle 2 tablespoons of oil over the dough and lightly oil your hands. Roll the dough in the oil to coat then cover with plastic wrap. At this stage you can place the dough in the fridge to proof overnight if you prefer.
First rise. Place the dough in a warm spot and allow to rise for 1 hour or until doubled in size. Drizzle over another 2 tablespoons oil and fold the dough from the outside in 4 times, turning the bowl as you go. This isn’t a super technical step – literally just grab some of the dough and fold it towards the middle. Cover the dough again and allow to rise for at least an hour but ideally overnight in the fridge. This slow fermentation allows so much more flavor development.
Form the focaccia. Remove the dough from the fridge 90 minutes before you intend on baking it. Spray a deep baking dish with nonstick cooking spray then add 3 tablespoons oil. I prefer using a deeper dish because I like a softer texture. If you want to keep it traditional, use a rimmed sheet pan. Tip the dough into the pan, trying not to disturb it too much. With oiled fingers, dimple the dough, spreading it into the corners. If the dough feels tight at all, leave it for 10 minutes then try again. Let the dough rise for 30 minutes at room temperature while you preheat the oven to 390°F/200°C.
Bake. Drizzle over any remaining oil then sprinkle over a generous pinch of flaky sea salt. Place in the oven and bake for 30-40 minutes or until the bread is golden brown and crisp on the outside and sounds hollow when tapped. Allow the bread to cool in the pan for a few minutes then remove and allow to cool on a wire rack for 10 minutes before slicing and serving.
Freezing and storing
- Can I freeze focaccia bread? Focaccia is definitely better on the day it is made but you can freeze any leftovers. Tightly wrap in plastic and freeze for up to 3 months.
- How to store focaccia: Store the baked and cooled bread in a paper bag. This allows the bread to breathe while preventing it from drying out.
Can I add toppings?
Yes absolutely. I prefer a simple bread flavored only with flaky sea salt, but you can add olives, cherry tomatoes and basil, caramelized onions or herbs to the top of the bread before serving. Fresh rosemary and oregano are delicious additions. You can also treat focaccia dough as pizza dough and add your favorite pizza toppings.
What to serve with Focaccia
Homemade focaccia bread is a great side dish to almost any main/entree but it’s especially good as part of an antipasto platter or served with olive oil bread dip. I also love sandwiches made with focaccia piled high with salami, fresh rocket/arugula and good cheese.
Video
Ingredients
- 4 cups flour (I prefer 00-flour but bread flour works well too)
- 1 tsp salt
- 2 cups warm water
- 10 g (2tsp) instant yeast
- 1 tsp sugar
- ½ cup olive oil
Instructions
- Combine the instant yeast with warm water and sugar. The water should be just warm enough so that when you put your finger in, it feels like nothing (this is called blood temperature). Allow this mixture to stand for a few minutes until foamy.
- Combine the flour and salt in a large bowl (I use my stand mixer fitted with the dough hook attachment). Mix then pour in the yeast mixture and 1 tablespoon of olive oil.
- Mix for a few minutes until everything is well combined. The dough will be very wet and sticky, almost like a thick batter.
- Drizzle 2 tablespoons of oil over the dough and lightly oil your hands. Roll the dough in the oil to coat then cover with plastic.
- Place the dough in a warm spot and allow to rise for 1 hour or until doubled in size. Drizzle over another 2 tbsp oil and fold the dough from the outside in 4 times, turning the bowl as you go. Cover the dough again and allow to rise for at least an hour but ideally overnight in the fridge. This slow fermentation allows so much more flavor development.
- Spray a deep baking dish with nonstick cooking spray then add 3 tbsp oil. Tip the dough into the pan, trying not to disturb it too much. With oiled fingers, press into the dough, spreading it into the corners and creating a dimpled appearance. If the dough feels tight at all, leave it for 10 minutes then try again. Allow to stand for 30 minutes while you preheat the oven.
- Preheat the oven to 200°C/390°F.
- Drizzle any remaining oil over the focaccia then season the bread generously with flaky sea salt.
- Place in the oven and bake for 30-40 minute or until the bread is golden brown and crisp on the outside and sounds hollow when tapped.
- Allow the bread to cool in the pan for a few minutes then remove and allow to cool on a wire rack for 10 minutes before slicing and serving.
Nutrition
FAQ
I use 00 flour for the best results, it’s finely milled Italian flour that creates an incredibly light, airy crumb with a beautifully crisp crust. That said, all-purpose flour (plain flour in the UK) works perfectly well and is the most accessible option. Bread flour creates a chewier texture with more structure. All three work in this recipe, but 00 flour gives you that authentic Italian focaccia texture.
Absolutely! All-purpose flour (or plain flour if you’re in the UK) works beautifully in this recipe. You’ll get a slightly denser focaccia compared to using 00 flour, but it’s still delicious with a great texture. The recipe and method stay exactly the same, no adjustments needed.
Yes, bread flour works well for focaccia. Because it has a higher protein content (12-14%), it creates more gluten development, resulting in a chewier texture and more structured crumb. You may need to add a splash more water as bread flour absorbs liquid differently than 00 or all-purpose flour. The final focaccia will be slightly less light and airy but still delicious.
Yes, it’s my top recommendation! 00 flour is traditional Italian flour that’s very finely milled, which creates that signature light, airy crumb and crispy crust you get in authentic Italian focaccia. It absorbs water differently than other flours, which is why this dough is quite wet and sticky. If you can find 00 flour, it’s absolutely worth using for the best possible texture.
Yes! While I prefer the overnight cold fermentation for maximum flavor development, you can absolutely make focaccia the same day. After the first rise (about 1 hour), do the fold, then let it rise for another 1-2 hours at room temperature instead of overnight in the fridge. Form it in the pan, let it rise for 30 minutes, then bake. Total time is 3 hours from start to finish.
Yes, focaccia freezes beautifully for up to 3 months. Allow the bread to cool completely, then wrap tightly in plastic wrap followed by aluminum foil, or place in a freezer-safe ziplock bag. To reheat, thaw at room temperature, then warm in a 350°F/175°C oven for 10 minutes to refresh the crust. You can also freeze slices individually for easy grab-and-go portions.
No! While I use a stand mixer fitted with a dough hook because it’s convenient, you can absolutely make this by hand. Simply mix the ingredients in a large bowl with a wooden spoon or spatula until combined. The dough is very wet and sticky, so it doesn’t require kneading. It actually comes together easier than traditional bread dough.
Focaccia bakes for 30-40 minutes at 425°F/220°C until golden brown and crisp on the outside. You’ll know it’s done when it sounds hollow when tapped on the bottom. The exact time depends on your oven and the depth of your pan. Deeper pans take slightly longer than shallow sheet pans.
Instant yeast and active dry yeast both work in this recipe. Instant yeast (also called rapid-rise or bread machine yeast) can be mixed directly into the flour without proofing, though I still proof it to make sure it’s active. Active dry yeast has larger granules and should be dissolved in warm water first. If using active dry yeast, use the same amount and follow the proofing step in the recipe. Both will give you great results.
Yes! Focaccia is one of the easiest breads to make at home. The dough is very forgiving – it’s wet and sticky, so there’s no kneading required. You just mix, let it rise, fold it a few times, shape it in the pan with your fingers and bake. Even if you’ve never made bread before, you can make incredible focaccia. The overnight rise does most of the work for you, developing flavor while you sleep.
I’ve been making this for years and it’s amazing… but I just noticed a discrepancy in the recipe directions and what you say throughout the blog… the recipe itself say to heat the oven to 390f but through the rest of your discussing it, it says 425f … ?
My apologies, I’ve amended the copy. 🙂
I’ve made this several times now and it’s always delish! I can for sure say 00 flour is the best, I can for sure tell in the crust. Thanks for sharing!
So wonderful to hear. Thanks Sylvia!!
This is such a fantastic recipe! So easy,and it came out delicious! This will be my go to recipe from now on. Making some pizza out of it tonight! Thank you so much for this recipe:)
This is my no fail focaccia recipe!! Will never try another as it’s perfect!
Love trying different toppings combinations!
Have tried quite a few recipes for this type of bread and this is the best recipe by far.. Yes it was sticky and wet, I had my doubts, but the end result with Maldon salt and rosemary from the garden was delicious. Thank you.
Oh wow, I am so glad to hear that Susan!
Hi – I just wanted to know what size pan to use? Thanks.
My pan was approximately 9×13.
Turned out amazing! A really simple recipe that results in a beautiful, versatile bread ?
I couldn’t believe how easy and delicious this bread was! I’ve been afraid of making yeast dough for years — but WOW this turned out great.
Hi Alida! I have made this once before and was so impressed! I’m keen to make it again but want to try the overnight proofing to save time on the day. When I take it out the fridge, do I just resume from step 5 AFTER “Place the dough in a warm spot and allow to rise for 1 hour or until doubled in size.”? Thank you!
Yup! Just let the dough come to room temp again before carrying on.